Every journey has a destination, and what one would encounter on the way is entirely up to chance. When I started this set of trades with Mr. Cosmia, I did so with noble (albeit) selfish reasons. Back then, I wasn’t as connected with people who shared my interests as I am now, and just wanted to share what I thought was a good game series. And on some level, I believe Mr. Cosmia thought the same. But then FromSoft games started getting into the mix, beginning with Bloodborne.
Full disclosure for those expecting a lighthearted review that will praise this game and the developers who made it a reality: you are going to be sorely disappointed for I have made it no secret of my animus towards these types of games. Dark Souls was the progenitor of the souls-like genre, games that put you in a world with little resources and expect you to conquer enemies that can shred your health bar in seconds if you’re not careful, and bosses with often very cheap tactics that can kill you even faster. They are the definition of “Get gud” games, where you are expected to win by learning patterns, adapting to situations and overcoming obstacles after several attempts. Occassionally, you are thrown a bone by the developers, be it new weapons, upgrades to your limited healing item or other things to “help” you. Often, the games employ alternate paths (a closed gate for example) near where you enter the enemy infested area. Pulling a switch on the other side of the gate will open it, and allow you to avoid the enemies you had to get through to get to it. But make no mistake, for you’re still feeble enough that the random dog can take you out if you’re not careful.
These games are a popular pastime for those who enjoy a hard challenge, but I am not one of those people. If I wanted Mr. Cosmia to try a lengthy game, 5/10 times a FromSoftware game was going to be given in exchange and many days of suffering would endure. But ultimately, I prevailed thanks to the leniency of Mr. Cosmia, who didn’t expect me to platinum them and get every ending. “Just get to the end” was the aim of the game, and that’s the bar that I set out for. But I then began to realize that FromSoftware is just going to keep pumping out harder and harder games that I’d inevitably have to play in the trade. So I did what I always do, I bargained. I’d play whatever FromSoftware game of Mr. Cosmia’s choosing, and that would be the final one eligible for the trade. After I finished it following the traditional checklist and required bosses, that would remove any souls-like game from being elligible in the future of the trade. It was down to either Elden Ring or Sekiro, and I ultimately went down the latter option. So here we go, the one for all the marbles. This round of the game trade I will be taking on Sekiro: Shadows Die Twice for the PS4.

The Story
The game takes place during the Sengoku era (roughly spanning from 1467 to 1615 A.D) where according to an unseen narrator:

We’re treated to a visual of numerous samurai daimyo’s going at it, slashing at each other’s throats with swords, shooting arrows into heads, it’s a real battleground. Further in the battlefield, two lords, General Tamura and Isshin Ashina are fighting, using moves that the player will be intimately familiar with such as mikiri counter and the death blow in due time. Eventually, Tamura receives a stab in his left foot, leaving him open for Isshin to leap on his back and wedge his sword through his neck. This of course, kills him and leaves Tamura’s forces without a leader, allowing Isshin to take over the land. Honestly, not sure what Tamura was really thinking going into this fight. If I’ve learned anything from Fire Emblem, using lances is often a bad idea if you’re a knight class, as they’re less accurate. They might be good against swords, but I guess Isshin was packing a lancereaver. In any case, Ashina’s forces take over the land and enforce their will upon the populace.
Off on an abandoned battlefield, an elderly shinobi known as The Owl encounters a young boy kneeling down in the middle of the conflict, dead bodies surrounding him. The scene implies that the boy was orphaned by the war, which is a very common occurrence throughout history. The Owl is impressed by this, and offers to bring the “starving wolf” with him, training him to be a very powerful shinobi in his own right. But all is not well in their clan, for the divine heir has been abducted (Who I’ll be calling the kid, because that’s what he is, a kid. Won’t lie, thought he was a girl with the haircut he had) and it’s up to the wolf to go on the hunt. With that, we’re given a brief tutorial of sorts. Sekiro differs itself from its other soulslike brethren in the sense that most fights can be avoided entirely through stealth. You can 100% pull a metal gear solid and hide against a wall, wait for an enemy to walk past and then use the death blow on him, killing most standard grunts and severely wounding larger opponents. You can also overhear conversations of enemies and learn various bits of info, such as the nearby tower is rather drafty, as it is missing a wall.
Sneaking around to the tower, you reunite with the kid, who was abducted by Genichiro Asahina for the express purpose of using his blood. See, the blood flowing through the kids veins is divine dragon blood, which when consumed makes one immortal so the possessors of the blood are often targets by rival groups. You make a plan with the kid to escape from Asahina Castle (one of the main locations you explore) and head for a nearby field. Unfortunately, your attempt to flee is halted by the lightning wielding general Genichiro, who effortlessly decimates your health and makes quick work of you. I’m not even sure you CAN win this fight, but I knew that this was going to be a FromSoft boss through and through and just let the death happen. Wolf squares up for another slash but Genichiro cuts his left arm clean off, which as a left handed person made me horrified at that possibility. I know Japan has a very small left handed population (and their society strongly encourages the use of one’s right hand) but it really resonated with me.
Eventually, you awaken in a mysterious cabin in a grove that’s owned by a man who goes by the name “Sculptor”. And sculpt he does, as the interior is laden with wooden buddha figures of various sizes that he has carved by hand. He also carved a prosthetic left arm to replace the one that Wolf lost, and tells him that Kuro was taken by Genichiro again. Armed with a wooden swiss army knife that grants you new abilities, you’re let out of the courtyard and begin your long open world journey to reclaim the kid, beat Genichiro and end this charade once and for all.
Gameplay
True to all Dark Souls inspired games, it is an adventure game with a heavy combat based system. You’re given limited resources at the beginning and are given “bread crumbs” to improve your stats that make you marginally better at fighting opponents. In Sekiro’s case, you have your gourd seeds, prayer beads, prosthetic attachments and boss memories, each of which helps various aspects.
Gourd seeds are well, seeds that you give to Lady Emma (a doctor and sole sane woman in all of Japan apparently) to expand your healing gourd up to a maximum of 10 uses. These are hidden throughout the world, purchased in shops or acquired through sidequests. I wasn’t able to find the last gourd seed, but when I did find them I made a beeline for Emma to increase my healing potion count because like all FromSoft games, healing is a luxury not a right.
Prayer beads are acquired similar to gourd seeds, but are often rewards for defeating mini bosses. If you acquire four beads, at any sculptors idol (which is your recovery/save point/fast travel system) you can forge them into a prayer necklace and increase your posture, which you’ll want to upgrade as much as you can. Posture is a mechanic that effectively dictates how you win/lose fights, and builds up when you block attacks/take damage. Taking damage will fill the bar, and if full, you’re at the mercy of your opponent who will inflict large amounts of damage to you. Conversely enemies that have high posture in their bar will be susceptible to a death blow if you fill it all the way, which is how you’re going to defeat every opponent in the game. So having high posture reduces that chance and that’s where these beads come in. There’s 40 total, and unlike the gourd seeds I did find them all, if only because the final boss was very difficult.
Prosthetic attachments are the game’s upgrade system of sorts, allowing you to utilize various built in tools to the arm to help in combat, like launching shuriken’s or quickly deploying a shield to protect against attacks. While I won’t be going over all of them, I’ll list the base forms of them and what they do
- Loaded shuriken- helps clip the wings of airborne opponents, but does little damage
- Flame vent- spews out a jet of fire that can ignite opponents, helpful against certain enemies afraid of fire/weak to it.
- Loaded axe- A slow, heavy axe that takes time to wind up, but when completed does good damage AND can break enemy shields.
- Shinobi firecracker- Firecrackers that can temporarily blind most enemies and scare beastly foes, giving you breathing room.
- Loaded spear- A thrusting weapon meant to jab from a distance further from your sword.
- Mist raven- Feathers of a raven that allow you to teleport behind an enemy if you time it right before you take a hit, very useful for certain quick opponents but not easy to master.
- Loaded umbrella- An iron umbrella that can deflect attacks, but you can only use it for a brief window of time. Great if you do manage to pull it off as it can come in clutch for later fights.
- Sabimaru- A sword drenched in poison. Using it deploys a quick slash that has a chance of poisoning certain foes.
- Divine abduction- A large, leaf shaped fan that allows you to act out your Tengu fantasies. Using it creates whirlwinds that can damage opponents, and for certain monk enemies, can kill them instantly. Didn’t use it much though, so can only say so much.
- Finger Whistle- A finger shaped whistle that when blown, can disorient certain opponents, but mostly animals and monsters
Using these tools can give you an edge in combat, but since they have limited use through the spirit emblems that they’re tied to, you can’t use them whenever you want. So like always, the game forces you to be strategic with resources and not spamming them whenever you feel like. Of these though, my favorite has to be the loaded umbrella. It’s quick, but the ability to null damage from all fronts is an invaluable tool in games like this.
Boss memories are one of only two ways to increase your attack, and are as the name suggests, memories of the bosses that you have faced throughout the game. Reflecting on these memories are the only way you’ll grow strong enough to face tougher foes with slightly easier chances, so you’re strongly encouraged to fight every opponent you see to boost your strength.
Another skillset are Shinobi arts, which are special moves you unlock through finding hidden texts throughout the game. These cost spirit emblems the same as attachments, but are often very powerful and if used at the right time can tip a battle strongly in your favor. I have to take this time to mention one in particular that saved the game when I got it: the Mortal Draw. Just like it’s Legend of Zelda incarnation, the skill is very powerful, with two slashes coated in black darkness that cleaves through enemy defenses. NO enemy in the game can block this attack, making it excellent for cleaving through opponents that have their guard up and build up their posture gauge. The only downside is there is a long windup before you can use it, which against fast opponents leaves you a sitting duck for punishment. It’s the skill that I used to win the game and if it weren’t for that I’d still be stuck on the final boss to this day possibly.
The Setting
The setting is feudal Japan, focusing primarily around Ashina castle and the surrounding environs. As expected of a FromSoftware, the different locations are quite the sight to behold, from the frost riddled walls of the gun fort to the foggy forest of the Ashina depths you’re exploring scenic locales and fighting a variety of a handful of monster types. I’d argue it’s a bit TOO clean though, as other FromSoftware ventures put other western settings as well, disgusting post apocalyptic towns and cities in ruins with horse carcasses everywhere while the worst places have crickets the size of chihuahuas in the attics. Perhaps its not surprising since a Japanese developer made it, but it does feel a bit in poor taste. That being said, if I had to pick a favorite locale I liked the Fountainhead Palace best.

It’s a place built around a colossal Sakura tree and features a big lake in the dead center of it. While a lot of the more annoying enemies make their homes here, the ambiance makes up for it, if only a little. Both me and Mr. Cosmia have lived near the coastline most of our lives, and while I can’t really speak for him it’s always been comforting being near the water. That and exploring the depths of the lake is cool, seeing all of the sunken homes and the remains of a giant carp at the deepest depths always intrigues me. It’s like whalefalls, but with fish!
Boss Ranking
In most game trade reviews, we rank areas based off of personal preferences. But this time around, I’ll rank the bosses as they’re what most people who subject themselves to these games want to see. As I learned, not every boss is created equal, and some that give people a rough time might be a cakewalk for others. Not every boss gave me trouble, so here’s how the list is going to go: the closer a boss is to the top, I “enjoyed” fighting it, with the furthest from the top will be reserved for bosses that gave me too much trouble, were badly designed (in my opinion) or other reasons like a high death count. I’ll also mention the death count when applicable. All images are taken from Sekiro’s wiki, without which I would’ve been lost.
Best Boss: Folding Screen Monkeys
deaths: 0

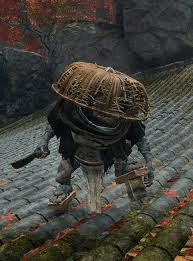
Easily my favorite boss goes to the Folding screen monkeys. This quartet of mischievous macaques are faced in a mysterious realm, and are not a single boss but multiple entities that comprise a boss. Each are based off of the Four Wise Monkeys which exhibit the concepts of see no evil, speak no evil, hear no evil and do no evil and that classification plays into how you fight them. You have to use the deathblow on each one, but you need to rely on catching certain ones off guard to hunt the others. For example, if you encounter speak no evil first, he’ll alert the others to your location, making hunting down the other three harder as they’ll be aware of where you are. hear no evil can hear you even when you’re being stealthy, but his eyesight is very bad. This is a fight that doesn’t require strategy in the traditional sense, but tactful dispatching of targets in the right order to beat the boss. It’s of course a lot of people’s least favorite bosses, but the simplicity of it and the fact you don’t even have to die once is a definite boon.
Mist Noble
Deaths: 0 (as it should be)

The Hidden Forest is a location covered in thick blankets of fog, making it hard for you to navigate through the trees and forcing you to be on edge with all of the enemies around. You learn from conversations that an old man is the cause of the fog, spreading it around and bringing forth ghosts that further complicate your journey to Mibu Village. This old man is the mighty Mist Noble, and he is a truly terrible, horrible and vile….
joke, he’s a joke.
This boss uses the same model of the palace nobles that appear in Fountainhead Palace, and he’s just as feeble as them. When you first encounter him, you can deathblow from above and then wail on him till he dies. I fail to see how anyone on the planet could die to this boss, given that ANYTHING you use could take him out. I just slashed at him and upon his death, the fog around the area dissipates, making it safer to explore and collect things. A rare event in FromSoftware games I assure you.
Lone Shadow Longswordsman
Deaths: 1
In the very same room that the journey began, the Lone Shadow Longswordsman stands and waits. He was tasked with killing a “cowardly wolf” who is dumb and incapable of fulfilling his job requirements. Unfortunately for him, he arrived much later than he should have, as by the time you can actually fight him, you’re much more prepared to take him on with the various upgrades and prosthetic to help you against him. The fight isn’t hard, especially since you can deathblow from above and catch him off guard, but the worst thing about it is the camera.
Sekiro’s camera has difficulties dealing with cramped enclosed spaces, and the room is barely big enough to fight in. Even though this fight is less than ideal, I can’t discredit what it’s meant to be, a show of how far you’ve grown. His dialogue implies that he was sent to dispatch you when you were down on your luck and wallowing at the bottom of the reservoir, but your journey not only strengthen you physically but mentally. You did manage to save the heir, and have a renewed purpose that gives you the strength to get up and keep on fighting.
Divine Dragon
Deaths: 2
Fire Emblem called, they want their Manaketes back. But in all seriousness this isn’t a hard fight. It’s rather simple in both phases. When you start you’re in a realm of clouds, surrounded by old tree dragons that you have to kill to deplete their hp and start phase two. In phase two, you fight the main dragon, who wields a large sword that can create gale force winds to blow you back. Contrary to what you’ve been told all your life, you have to go to the highest point in the area in the thunderstorm and purposefully electrocute yourself to redirect the bolt at the dragon and deal damage. It’s a fight of sheer spectacle and simplicity, with an easy boss memory to bolster your strength. The only thing that holds it back is that killing the dragon is considered a bad idea for if you’re trying to go for a specific ending, as another divine child is tied to its life, and when you beat this boss you effectively lock yourself out of that route’s ending.
Chained Ogre
Deaths: 7
Easily one of the first roadblocks a player may face, the chained ogre is a large man in shackles and a stockade, whom the Ashina guards have posted outside the doors to the castle. While a mini boss, you have to fight this guy and win, which is easier said than done. At this point, you have no strength upgrades and very few beads to increase your health, and you’re only given one single thing to help you: fire. This inhuman monster will attempt to put out any fire that you put upon him, which is great in theory, except that it leaves you with a very small window of opportunity to do damage to him. The rest of the time he’s slamming you all around, throwing you like a ragdoll or suplexing you into the ground like this is WWE. After you do defeat him, you’ll encounter another version of him as an enemy near the end game, and another holding a bead in the center of Asahina castle, which is a trend that becomes very apparent later in the game.
Gyoubu the Demon
Deaths: 2

A large man mounted on a colossal horse, he towers over the already tall wolf, specializing in using his spear to skewer and slam you around the wide arena. Thankfully though he has one crippling weakness, this time it’s his horse. You learn through eavesdropping a nearby soldier that beasts are afraid of loud noises, and you should have access to the shinobi firecracker. Using it will cause his horse to rear up and allow you to inflict a lot of posture damage, but like always, you have limited use of the miraculous crackers. Honestly not a hard fight and I’m glad it’s a fair challenge.
Drunkard-type enemies
Deaths ~5 each
These mini bosses are practically identical, so it’s easier to just talk about Juzou, who you fight outside the Hirata Estate as it burns to cinders. Both are gargantuan men with disheveled appearances, carrying a gourd and armed with a sword that they sling over their shoulder. They fight using a sword style that implements Zui Quan (or drunk fighting style in English) and use the gourd to spew out a vile concoction that poisons Sekiro on contact. They are also surrounded by grunts, one of which carries a wooden shield (easily broken with the axe) and a few that specialize in firearms. Thankfully though, you can very easily go in and dispatch the weaker soldiers with a few ambushes and then stealth deathblow Juzou when he least suspects it, making the fight easier. In a nearby pond you can also enlist the help of Nogami Gensai, a man who will “aid” you in your battle (aid is a strong word, he’ll draw Juzou’s attention and CAN die in the fight, but his help does make the fight substantially easier). Upon death, he drops unrefined sake and a prayer bead for your troubles, so it’s worth getting rid of him. His “brother” is located within the foggy Ashina Depths and is basically the exact same, but without assistance so it’s slightly harder.
Bull-type enemies
Deaths: 7 total

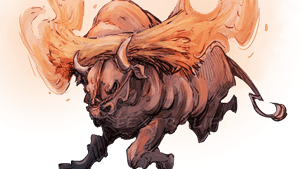
These burly bovine are one of the more dangerous foes you’ll face if you’re unprepared, but if you know what you’re working with they’re simple fights. Like all beast-type enemies, the shinobi firecracker is your best friend, capable of stunning them for a bit and allowing you to get some good hits in. They’ll charge and smash up the place as well, a bull in a china shop but they’re not too terrible to deal with. Honestly when fighting the fountainhead palace boss I don’t think I ever even died to it due to being much more accustomed to the game’s BS that it didn’t phase me anymore. Grab the bull by the horns once and you can do it again I guess?
Sniper-type Enemies
Deaths ~15
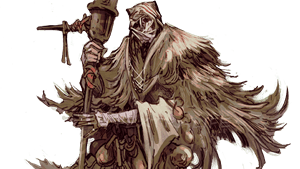
These mummy looking mistresses of the musket are trained in the art of sniping, capable of holding down the infamous gunfort from any would be shinobi with shots from miles away. They are as adept at close range combat as they are long range, but they have a crippling weakness: The Sabimaru. This rusted blade injects its coppery corrosive chips into their blood and inflicts them with poison, slowly whittling away their health over time as the time honored status ailment often does. That is save for one, Shirahagi who Sekiro fights in a valley filled with toxic gas.
Due to the overwhelmingly toxic pits she surrounds herself with, she’s immune to the Sabimaru’s effects, but apparently luring her into the pool is also an effective way to whittle down her health. The only thing though is that you’d need to take out the snipers around the area as they’re inevitably going to put bullets in you.
Long-arm Centipede Giraffe
Deaths: 10

This long armed f***er will test the patience of many who want to beat this game. Ignoring his nonsensical name (why giraffe? I’ve stopped questioning a series where invisible crows with the voices of young children give you items) this guy tests your ability to build posture damage through guarding. If you guard his attacks perfectly, he’ll build up posture, and when full you can eliminate him. Sound simple enough right?
Wrong, because by the time you encounter him, you might not have enough beads to have good enough posture health on yourself, so as he relentlessly attacks you, your posture is going to build up like crazy and if it’s full, YOU’RE at the mercy of the opponent, who will just cut you to ribbons faster than you can react. It took 10 attempts of blocking, spamming special moves and so many sugar candies to bolster my meagre posture but I did it in the end.
Lady Butterfly
Deaths: 7
Ai yai yai, Lady Butterfly. This fight is too tough for the average young guy.
One of the former trainers of the wolf gone rogue, Sekiro fights her during the Hirata estate assault that you access through timey wimey shenanigans. She’s very agile, capable of bouncing around on the air itself and slashing around the battlefield with quick attacks. To win, you need to parry and keep on her, and know when to dodge or keep the pressure to build up her posture meter. If she’s in the air about to dart at you, launch a shuriken to clip her wings. If she lunges at you, dodge to the right or left. Or, if you have mortal draw cleave through her defense to rack up unblockable damage. This fight can be done very early in the adventure, but you can put it off until much later (which is what I did)
Corrupted Monk (All versions)
Deaths: 10
Sekiro has a lot of bosses to fight, but about 40% of them are reskins. Case in point: The Corrupted Monk. This colossal corrupted convert guards the entrances to a cave (the blue one) and the entrance to Mibu village (the “true” one). Since they’re both the same fundamentally, they have the same attacks but different strategies apply when fighting them, and I’ll briefly go over some differences.
The blue corrupted monk is a spirit, and is therefore affected by divine confetti, which when sprinkled on your sword allows it to deal extra damage against apparition type enemies like ghosts and demons. This is important, as a lot of fights can be lost due to the slow chip damage you’d do otherwise, so stockpiling them is good. and this one especially. The naginata that it wields can be mikiri countered at just the right time to inflict good posture damage, but the timing as always has to be perfect. Fistfuls of ash and the shinobi firecracker can also be used as handy “stop what you’re doing” tools to give you some brief control over the fight.
The true corrupted monk however, is a bit more difficult, possessing 3 health bars, she needs 3 death blows to be killed and of course, each fight is progressively harder. The first phase remains the same as the earlier one, but the second is where she shows her true mastery. She’ll create fog and summon illusory doubles of her that are just as dangerous, but you can climb to the top of a nearby tree and locate the true one. Doing a deathblow instantly cancels out the rest of the phase and initiates phase 3, where you learn that she is immortal, evidenced by the giant centipede that emerges from her neck. Her attacks are easily telegraphed now but do more damage, and the artery eating arthropod can spew toxic bile from its mouth than inflicts terror on you if you’re not careful. But with persistance and precise timing you can beat her, it’ll take a bit though.
Great Serpent
Deaths ~22
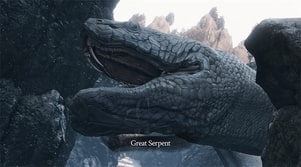
I hesitate to call this a boss, but I guess we’re operating on “if it bleeds it can die” logic. Though how IS this thing alive in the snowy mountains of Asahina’s territory? Snakes are pokilotherms and are reliant on external sources of heat to function, which I doubt the freezing peaks are giving enough to warm its scaly hide. This colossal cobra relative is a perpetual thorn in Sekiro’s side as he explores the outskirts of Asahina castle, getting in the way and easily crushing you if it catches you in its jaws. What you need to do instead, is evade it, hide behind rocks and in tall grass to obscure its vision of you and sneak by. Eventually, when you arrive at an abandoned palanquin, you can stab it in the eye, blinding it and opening the way to escape. After dealing with it and narrowly avoiding this titanic titanoboa, you won’t see it again until much later in the game if you want.
Later in one of the higher peaks of Senpou Temple, you can set up a Rube Goldberg esque chain of events involving a shinobi kite that is conveniently positioned above the snake as it rests at the bottom of a ravine. Slowly making your way over towards it gives you a perfect opportunity to deliver the coup d’état to the coiled entity, ending its life and barely making up for the amount of struggle that it put you through.
Ashina Elite-type enemies
Deaths: Didn’t keep track
These men are masters of the Ashina sword style, meaning that they can deal deft blows by striking downwards with overhead strikes to easily break your posture gauge. They’re very reliant on you being able to block their attacks and slowly whittle them down to finish them off. Not much to say, but I do have to mention Ujinari Mizuo, who you fight in the same room as the first one you encounter before fighting Genichiro for the first time. He doesn’t fight fair, as there’s a purple shinobi in the room that will sneak up behind you if you’re not aware of him and they’ll double team you. BUT, if you use puppeteer ninjitsu, you can pull a Prince Marth and make an enemy into an ally for a few seconds and turn the tide against him. It’s rare the game gives you opportunities to use puppeteer ninjitsu and it’s a real shame, as it’s a pretty solid concept and can lead to a lot of humorous situations.
Headless
Deaths ~25 total
In various places around Asahina castle and its outer areas, there are ghastly apparitions that appear as headless bodies. Four in total, these bloated bogeymen slowly creep around, inflicting terror when Sekiro is in close proximity to them. Sword strikes do little to no damage, UNLESS you use divine confetti, which can make short work of them. Curiously, all four of them give out an art that corresponds to the four Buddhist sugars that Sekiro can use to improve posture, damage and armor, suggesting a connection. In any case, they’re tough opponents in the beginning, but if fought late game they’re a joke. They’re also susceptible to stuns from Malcontent, but I didn’t learn about that till later. Oh well, at least the underwater fights are significantly easier due to the salt present in the water purifying their spirits. That last part might not be true, but it could be? who knows?
Great Shinobi Owl
Deaths: Unknown (didn’t keep track of, let’s say 13)
On the route that Mr. Cosmia sent me down, I had to face the father of the main character, whose traditional beliefs conflicted with my choice to remain loyal to my lord as opposed to him. As such he resorts to violence as is most interactions in this game. He is fast for his age, darting around and throwing shruikens and much like yourself, has no super armor to protect himself unlike other bosses. Committing patricide isn’t easy, but compared a later variant of him, he might as well be a cakewalk. Though his healing removal skill definitely makes the fight a lot harder, but if you have rice you’re safe for a bit.
Guardian Ape
Deaths: 2
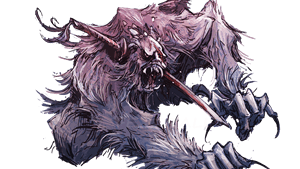
The first fight that I saw of this game was courtesy of Mr. Cosmia, and as it was this very fight. So the little “trick” to it didn’t work on me one bit. This King Kong wannabe slams down on Sekiro with primal fury and many melee focused attacks. Though honestly, he’s not that tough, as if you keep near his knees and dodge frequently you can quickly fill up the bar and decapitate him, ending the fight with little issue
Till his second phase kicks in
Unfortunately, this ape is immortal, and as such, decapitations without the mortal blade result in them coming back to life with a giant centipede coming out of their neck. It can scream a literal bloodcurdling shriek that inflicts terror and uses the sword that once sat inside of its head as a weapon, swinging it in tandem with its severed (and still living) head. Though even then this isn’t that hard of a fight, as a few dodges and careful resource scrounging can make it manageable. This is as far as I know the only fight where the enemy switches its enemy type (beast when it has its head, apparition when it doesn’t) so I have to give it credit for changing things up.
Headless Ape
Deaths: 4
The king of swing is back and this time he’s brought his mate along, resulting in a 2V1 fight that you’re likely ill prepared for the first time around. The attacks are largely the same, but the additional ape in the mix makes it a lot harder to deal with the main target. However, the second opponent does have some benefit to it, as the resurrection system requires blood to be spilled from an enemy to regain a charge (ANY enemy will do, but it varies, bosses and minibosses always fill one charge upon defeat) so if you lose one of your charges, defeating the brown furred ape will give you a second chance if you need it. This fight is problematic for me not in combat (it’s one of the easier fights by a wide margin) but for another reason, which I’ll talk about later in the review.
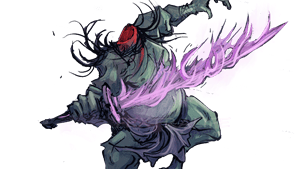
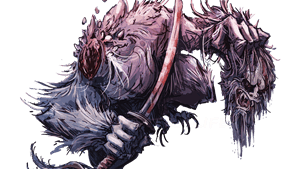
Demon of Hatred
Deaths: 14

This boss would fit right at home in one of the other FromSoftware games, but it’s stuck in this one so I must talk about it. This colossal Where the Wild Things Are reject is huge, with tons of fiery moves and charges that do damage in the ballpark of way too much. So you end up having to fight it by stabbing at its legs and crotch (which thankfully, is not anatomically accurate, though I know some degenerate out there is displeased with that information). This fight took a while, as he’s very mobile and unpredictable when close, as he’ll often leap in the air and then crash down on top of you, or do a full on charge outwards and deal 75% of your health bar in damage. In practice, fighting him reminds me a lot of another fight that I actually enjoyed from a series I love, that being the Julius fight from Kingdom Hearts Dream Drop Distance,
This big, Frankenstein’s monster looking fellow is a secret boss that can only be fought post game, and like the Demon of Hatred his moveset is eerily similar. He’ll leap up high and then crash down on you, getting up close will result in him pummeling you with his fists and he can even lunge towards you with a shoulder tackle. He even has control over electricity and can really ruin your attempt if you didn’t equip enough thunder screens. The one major difference though is that in KH, healing is not limited to 10 potions and you have more freedom of movement and access to powerful magic to turn the tide of battle.
But nonetheless I struggled, even though I was using what the internet (and Mr. Cosmia) was telling me to do. Using the folding umbrella (specifically Suzaku’s Lotus Umbrella) can block most of his attacks if timed correctly, at the cost of spirit emblems. One major tool that should be used, is the finger whistle Malcontent. As Mr. Cosmia so eloquently put it “It’s not a silver bullet to solve everything, but it’s more than I can say for a lot of the boss fights in the game”. Basically, you can use Malcontent to disorient the DoH, but you can only do it three times before he becomes immune to it. So you either do it throughout the fight, or do what I do and save it for the third and final phase, hoping that you can cut him down before he gets back up and starts thrashing around again. As an apparition, he’s also susceptible to divine confetti which will eliminate the chip damage that you’ll be doing otherwise while it’s in play.
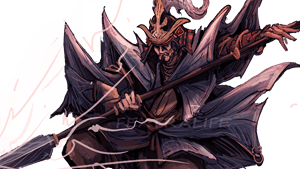
Genichiro Asahina
Deaths 50

This fight, this f***ing fight is the epitome of “get gud” in its most raw, ugly form.
This is the midpoint of the game, where you’re expected to know the combat and how it works by now, otherwise you’ll have a rough time. And have a rough time I did, as it took FIFTY attempts to beat this bastard. If you don’t get the timing down for a mikiri counter, he’ll run you through. If you don’t stay on him he’ll pick you off. Try to heal mid fight? he’ll shoot arrows at you to kill you. And then his second phase makes him even more of a piece of work, as he’ll try and cut you down with lightning. The lightning he slings can be redirected with very careful timing and even stun him, but you’ve gotta be perfect. I was on the edge of my seat during this fight, and with good reason because of course, if you lose you’re doing both phases again.
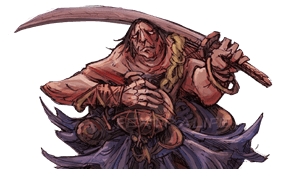
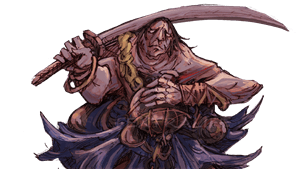
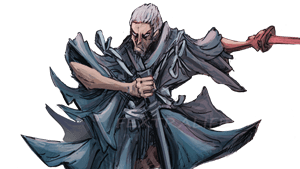
Owl (Father)
Deaths: ~50
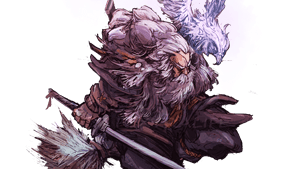
When I undertook the challenge that was this game, Mr. Cosmia, in his finite mercy gave me a very direct path to follow, and what bosses I had to fight with a lot of wiggle room for others that were optional. One such boss that I absolutely didn’t have to fight was this one, as Mr Cosmia so eloquently put it “There’s a boss I missed so I’m not requiring it of you”. But given the fact that this game is hard enough, I didn’t have a choice. I NEEDED that attack boost that he gives me for the final fight, which meant the optional bosses are now required if I were to stand an iota of a chance. So I tried numerous attempts, blocking his attacks and trying to figure out the pattern, but most of his attacks are unblockable and can’t be mikiri countered, so you need to get out of the way quickly. He is way too fast for someone old enough to be a grandfather, and his flashbang attack really doesn’t help when trying to close the distance.
And that’s not even accounting for his second stage. True to his name, he can summon an owl spirit and have it fly around the room, which also gives him even more range and maneuverability than he already had when flipping around during his first phase. Ultimately, I could’ve just said “Screw it” and not bothered with the fight, but then that would mean I would’ve conceded to Mr. Cosmia and let him win, which I didn’t want to give him the satisfaction. I contemplated cheesing the boss by getting him in a corner and then not finishing a combo, but elected against it, rather I spammed mortal draw when I could, clutching the edges of my couch with my toes and hoped I’d be able to defeat him. And defeat him I did, earning me the attack boost and relieving me of the frustration of ever having to do this boss again. But of course, there was one boss that was easily the hardest I’ve ever fought in a souls game. And that is no hyperbole, I’ve seen a lot on this journey that I wish I hadn’t. But there is one boss I couldn’t escape from no matter how much I wanted to. The boss in question?
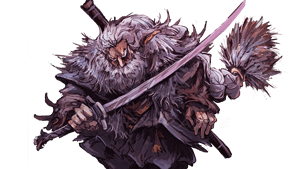
Worst Boss: Isshin the Sword Saint
Deaths: ~60
I don’t normally do this, but I think the best way to describe this boss comes from the wiki for the game, which reads “A master of both blade and spear. It will take all of Sekiro’s skills to defeat him”. That sentence is all you really need to know because this fight is the cumulation of every difficult boss thus far, such as lightning casting, incredible range with his spear, quick moves with his sword and so much more that I can’t describe in words. You HAVE to be on your game with this guy, as he doesn’t f**k around and will relentlessly pursue you on the battlefield. A battlefield which takes place on a plateau near a bottomless pit, that if you’re not careful, you will fall in and die. So you have to constantly be aware of where you’re fighting him, so he doesn’t just throw you over the edge with his attacks when he’s mere inches away from defeat.
All of this sounds bad to the average person, but it’s made worse by the fact that you have to fight him after a mandatory fight with Genichiro, which you’ll also have to perfect as death to either of them means you’re starting over from the beginning. This battle had me on edge the whole time, and forced me to use several of my one use items just to stay alive. The bundled Jizo statues I was saving for a special occasion? used them and only got through the first phase of him. Ran out of rice? these persimmons will help somewhat, but it’d be better if I didn’t waste a gourd use on Genichiro. When all was said and done, I immediately took a photo of the execution scene because I needed proof that it wasn’t a dream. That was how bad this fight was.
The Rodent Quota
This section is dedicated to the rodent quota, a time tested tradition dating back to the great Kingdom Hearts X Persona game trade that started it all. The TLDR is that games that feature rodents or rodent like enemies get a premium than games that don’t. Some games have an overabundance, like Mr. Cosmia’s half of this trade, while others are scant to none. And where does this one fall?
It falls in the none category, kind of.
There is a sidequest that you are given by a man who goes by the moniker “Tengu of Ashina” where he instructs you to kill some rats. A simple task that is an RPG staple at this point sure, but it’s misleading, as these are what they look like:
These short goblin looking fellows are derogatorily referred to as rats by Tengu due to their role as spies and informants. They possess no rodent features aside from small hands and nimble feet, and as such aren’t truly capable of filling the murine manifesto. In fact, most of the entirety of the game is rodent free even in areas where you’d expect them to be. So the game fails on that regard, big shock.
The Open-World problem
Now before I get to the conclusion and finale, I think its important that I address one of the main selling points of the game and it’s failure to truly implement that. One of the main quests of the game is to acquire the mortal blade, which is the only thing that can kill infested enemies that are otherwise immortal. If you don’t have it, you can’t kill them permanently and they’ll revive shortly after. One such enemy as I referred to was the Guardian Ape. You can indeed get the mortal blade before you fight him the first time, but you can’t kill him permanently, he’ll still be waiting in the depths for your second fight as the headless ape along with his mate.
And I have to ask, Why?
An open world game gives the players freedom to go as they please and tackle things at their own pace, but ultimately lead to the same conclusion with the final boss(es). That means getting tools out of sequence before you’re supposed to in canon, and the developers need to work around that to prevent plot inconsistences. And this right here is a plot inconsistency, for why does the blade exist if it can’t kill the unkillable until a scripted point? Why even introduce the mechanic if you force people down a certain path anyways? At that point, it’s not open world, it’s a pseudo open world.
So many other games handle the multiple route system infinitely better even with meager budgets. While I don’t know the budget of this game, I imagine it was in the ballpark of 90 million USD, maybe with an additional 30 million. That’s a rough guestimate because the true answer hasn’t been published ever and FromSoftware isn’t going to disclose that info. With that in mind, I have played games that handle this idea better even without being in the same genre, namely Fire Emblem Echoes: Shadows of Valentia

A remake of the second Fire Emblem game for the 3DS, it was made with a presumably meager budget as FE isn’t the most utilized Nintendo property. During the midpoint of the story you set foot in the enemy territory of Rigel, the instigator of the conflict that the two lords Alm and Celica have to stop in their own ways. Upon crossing a bridge you’re given two directions to go, left towards the plains or right towards the mountains. Heading left is where you have to go, which will lead to Rigel castle but the right is a place that could use a visit. It is home to Nuibaba, a sorceress who sacrifices beautiful women from a nearby village to her fell god in exchange for eternal youth. One such woman in her possession is a priestess who is the lover of a general in the Rigellian army named Zeke. If you kill Nuibaba, not only are you freeing the village from her machinations but you also free the priestess, who will tell you of Zeke’s plight and how he must obey his superior, even when his superior torments villagers for sport. Going to the left now would allow you to pass on the girl’s message, allowing Zeke to defect and aid you in your fight against his superior. And the best part? you don’t even have to recruit the priestess to your army, just unlocking the cage is enough to change Zeke’s mind. Heck even if you go to the left there’s different dialogue from the villagers, who all treat you with hostility for killing Zeke in combat, as he was the only decent soldier who bothered to stand up for them. All of that and so much more exists in this game and they made damn well sure that any plot holes from different paths were patched out.
Still not convinced? guess i’ll break out the big guns and use my favorite game of all time to prove my point: Kingdom Hearts

Released in 2002, this series follows a boy named Sora who lost his home to the heartless, beings of darkness that relentlessly hunt the hearts of men. While its budget is unknown, estimates put it in the 40-50 million dollar range, which even for a property with Disney involved, that’s pretty low for 2002 standards. There are numerous worlds you visit, and in the later half of the game, some become completely optional and don’t even need to be visited to beat the game. As such, some moments would be altered drastically depending on when you access them, leaving no stone unturned in regards to conflicting cutscenes. Heck, the alternate scenes are all voiced cutscenes, meaning that the developers took special note of what would contradict later scenes and worked accordingly. This is a game that came out on the PS2, What’s Sekiro’s excuse?
All I’m asking is that if they wanted to double down on the importance of getting the mortal blade, then make it have its effects be present in the Guardian Ape fight. Make it so that you don’t need to fight him again, at the cost of losing a permanent strength upgrade. If you implement an action in a game, it should have consequences and in a game where your actions (or lackthereof have DIRE consequences then it should be even more important to get it right.
Finale
After getting the divine dragon’s tears needed to sever the immortality that Sekiro and the Divine Heir have been blessed/cursed with, you meet with Lady Emma (the doctor and person who inspired Sekiro at the beginning of the game, she’s also default best girl because every other woman is either evil, old or dead) who tells you that the heir went out to the reservoir and is waiting for you to cut the bond. Unfortunately, Genichiro arrived first, and he has his own black blade and intends to use it on the divine heir. A fight ensues on the same plateau you initially fought him on, which results in his defeat, but oh no, he cuts his neck and out pops Isshin, who takes up the blade and fights Sekiro with intent to destroy him.
Following a very difficult fight that I already discussed, Sekiro decapitates the old man and tends to his charge. Due to my diligence and defeat of the Owl Father, I had in my possession the everblossom, allowing me to get one of the best endings. Due to the black blade cutting him, the heir is dying (as that’s the one thing that can kill immortal beings, it inflicted a grievous wound. Through the power of the everblossom and divine dragon’s tears though, Sekiro is able to heal his master, and then selflessly decides that he must sever his own immortality, saying to the sleeping child “May you live on, and embrace what it means to be human. The Wolf then turns the black blade on himself, slicing his neck and then fading into cherry blossoms.
Some time later, a grave marker with the Wolf’s sword has been placed in the same plateau, with Lady Emma burning incense and praying to him. She is eventually joined by the heir, now fully recovered and dressed to go on a journey. He vows to live a full life thanks to Sekiro, and thanks both him and Lady Emma for their help. cue credits.
Conclusion
What to make of this game, I wonder? Compared to other ventures it offered a lot that others didn’t (The ability to cheese a lot of bosses with stealth deathblows was nice) but in turn made a lot of fights tougher. Honestly, I can’t say that this game is going to get a high score from me in any world, because at the end of the day it didn’t do what I expect games to do. I play video games like many people as a form of escapism, because I’m not beating around the bush folks, life sucks. If I can be a hero, or an animal or do things I can’t normally do and derive enjoyment from it, then that’s what I look for in games. Sekiro didn’t do that for me, and I ended up nearly 100%ing it not out of genuine interest or fun, but because I didn’t have a choice. FromSoftware games give you what is essentially a thumbtack and bobby pins for a sword and armor respectively and expect you to kill monsters that can tear you limb from limb. So whenever I had to fight a boss, I often wondered, “Am I ready for this?” and 9/10 times I would respond with a hearty no. I didn’t kill every mini boss because I wanted to, I did it to increase my health because I HAD to. Optional fights were optional in name only because I needed what they dropped to get stronger. Previous soulslike games that I have played gave you HP increases as a bonus whenever you increased your stats. If you like this game, kudos to you because I can’t see myself ever coming back to it. So I ultimately give it 6/10, I can go lower. And so ends another chapter of the game trade. Hope this review was worth it Mr. Cosmia.
